Build instructions – Air Quality Monitor (v1)
Instructions in draft form. Please check back soon for updated instructions or sign up for our RSS feed to be notified.
Instruction outline
Click to jump to section:
- Preparation
- Solder connections
- Upload the firmware and test sensors/connection
- prepare enclosure
- Get researching!
1. Preparation
1a. Sign up to OpenScienceMethods
We are currently beta-testing our data portal and therefore do not have an automated sign-up.
To sign up for an account please therefore get in touch using our contact form.
1b. Buy required equipment
The equipment list below is a rough draft! Please get in touch for specific components whilst we’re finish the below
- SCD41 CO2 sensor (~£21 from e.g. Aliexpress)
- Plantower PMS-5003 laser particle counter (~£15 from e.g. Aliexpress)
- TTGO T-energy T18 (Wrover version!) (~£7 from e.g. Aliexpress)
- Qwiic connector (i.e. 4-pin male JST 1mm pitch cable)
- Plantower connector cable (i.e. 8-pin male JST 1.25mm pitch cable)
- Enclosure (~£6 *The enclosure we bought with a very snug fit is the 50x65x55mm here)
- 18650 Li-ion battery (~£10 from e.g. RS)
- 4x nylon bolts (M3 x 8mm)
Recommended tools:
- Soldering iron
- hot glue gun
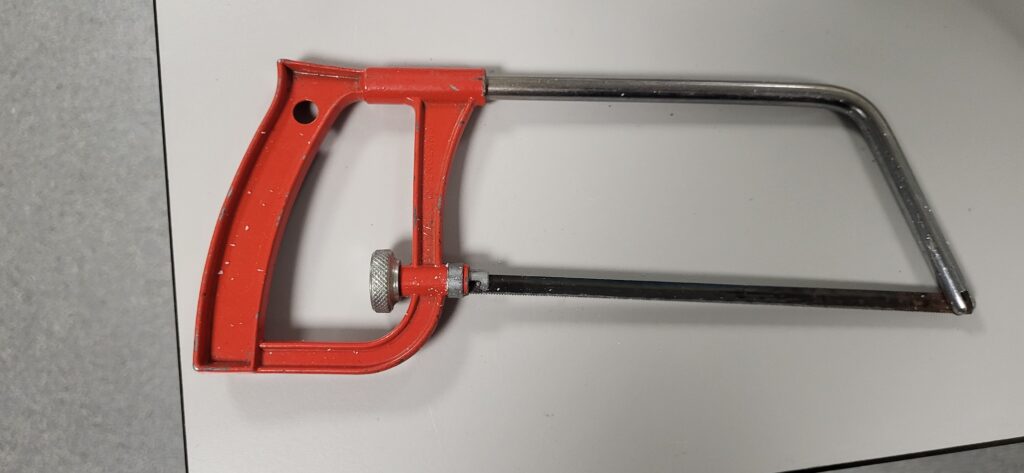
- Dremel or drill and coping saw/junior saw
- Multimeter
- Micro-USB cable
2. Solder connections
Solder the QWIIC cable connections below (order: QWIIC → Tenergy)
- 3.3V → 3V3
- GND → GND (recommend nearest the “boot” button)
- SDA → 21
- SCL → 22
It is generally easiest and safest to use a multimeter on continuity mode to determine which wire relates to which SCD41 output (whilst the wire is plugged into the SCD41).
Solder Plantower cable connections below (order: Plantower → Tenergy)
- pin 1 → 5V
- pin 5 → 13
- pin 2 → GND (next to 13)
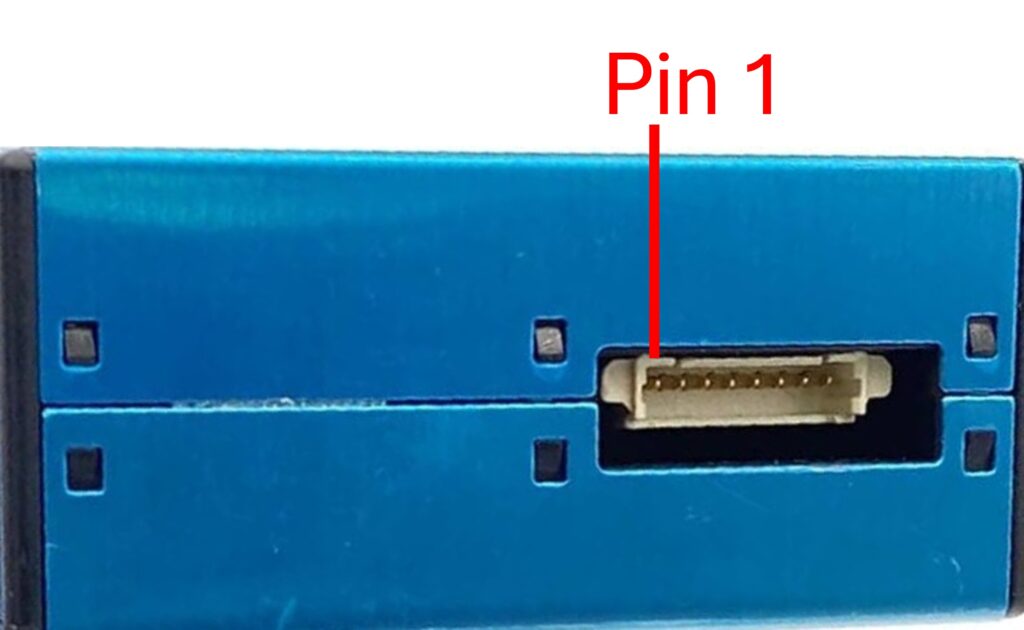
*pin 1 = closest to the middle of the PMS-5003 when connected
3. Upload firmware and test connection
Connect the logger to a computer via USB then upload the firmware using the web uploader below (requires Google Chrome or Microsoft Edge browser)
Check sensor data over Serial
Connect the sensors (remember to unplug before connecting the sensors!) then reconnect the USB
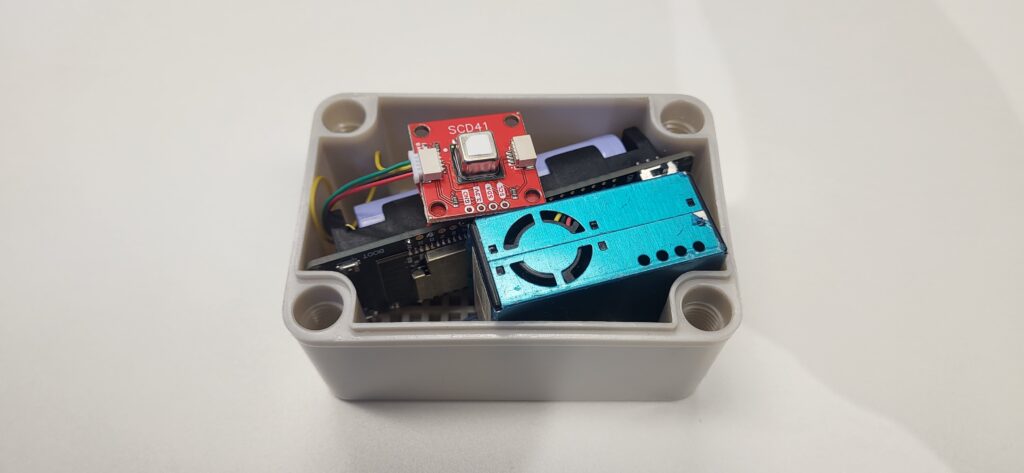
4. Prepare enclosure
Disclaimer: the below demonstrates how we prepare our own enclosures and does not constitute recommendation or advice. We take no responsibility for any injury or damage. Please ensure you adopt an approach in-keeping with your/your students’ age and skill level and ensure that you are using the appropriate Personal Protective Equipment (PPE) and taking the appropriate precautions. If you have any doubt, do not continue!
Note: there enclosure we used (listed in the parts list above) has a very tight fit. You may prefer to use a different enclosure. If using the same as above, measure twice and remeasure and sense-check that it will all fit together.
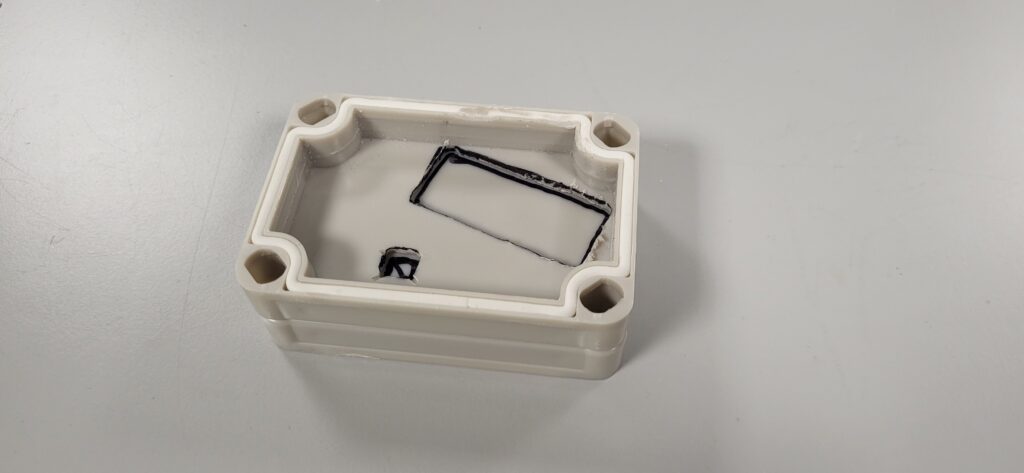
Ensure the Plantower sensor is pushed right in the corner before marking around it to be cut.
For the SCD41 marking, we want the sensor to be roughly alongside the edge of the opposite long edge. Obviously you want to ensure there is enough space for the Plantower, and that the bolts won’t be too snug with the edge (otherwise you will have trouble removing the nuts if ever you need, which we generally do recommend in our workflow).

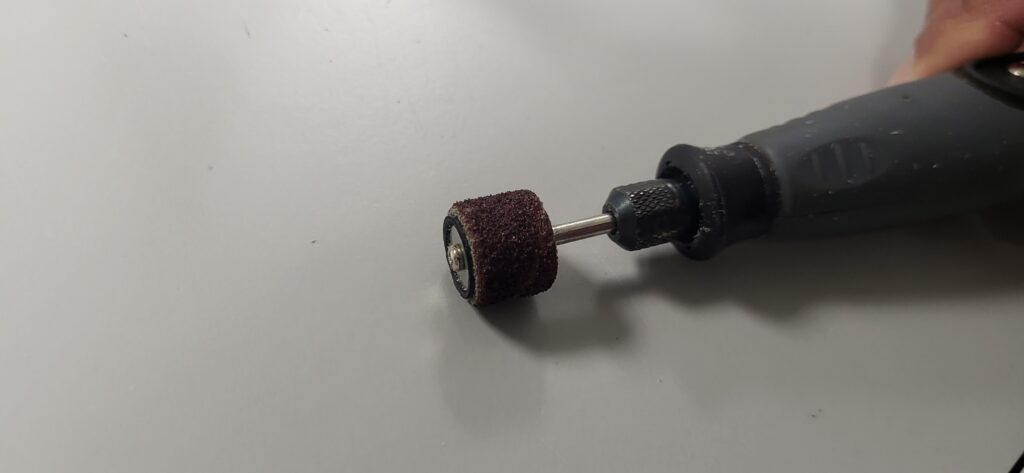
We then use a dremel with a cutting/abrasion disk (shown) to cut out the hole for the Plantower sensor. Ensure the Plantower can fit into the hole (a snug fit is good).
Alternatively, you may wish to drill a hole and use a coping saw or junior hacksaw to cut out the hole (see image below).
You may also wish to use a file or sanding bit to smooth the edges.
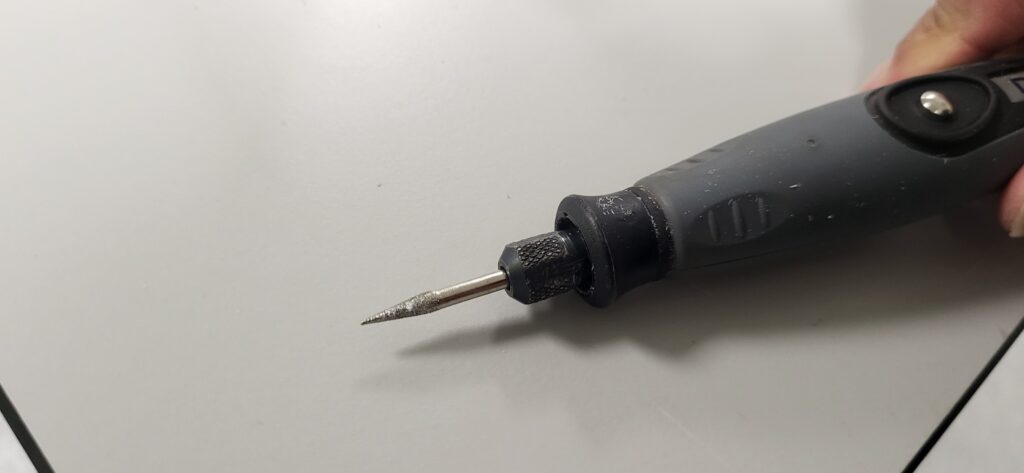
For the SCD41 Air Quality sensor hole we recommend NOT using a dremel cutting disk as the disk would create too large a hole. We used a pointed grinder in our dremel, though a drill and hacksaw could also be used.
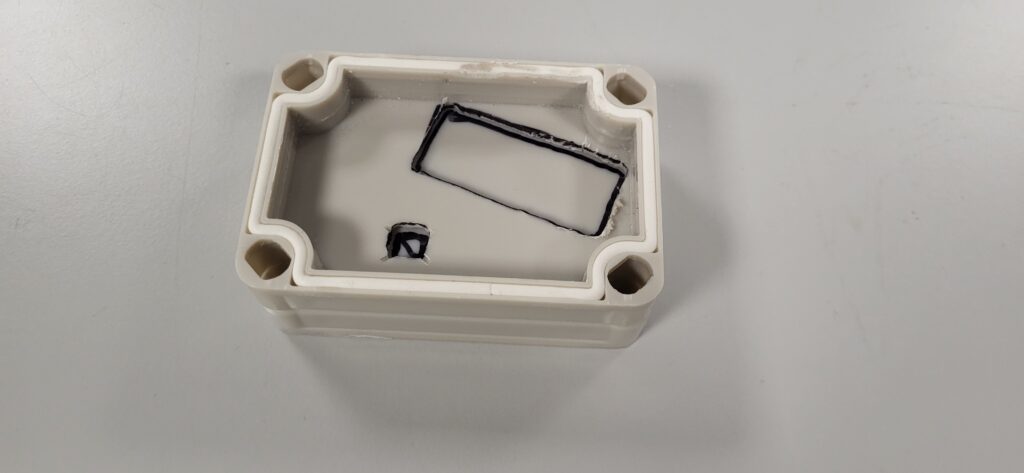
If making multiple, it is easier to use the first lid as a template to mark where the others should be cut. Ensure that the Plantower will be right in the corner (otherwise everything won’t fit!).
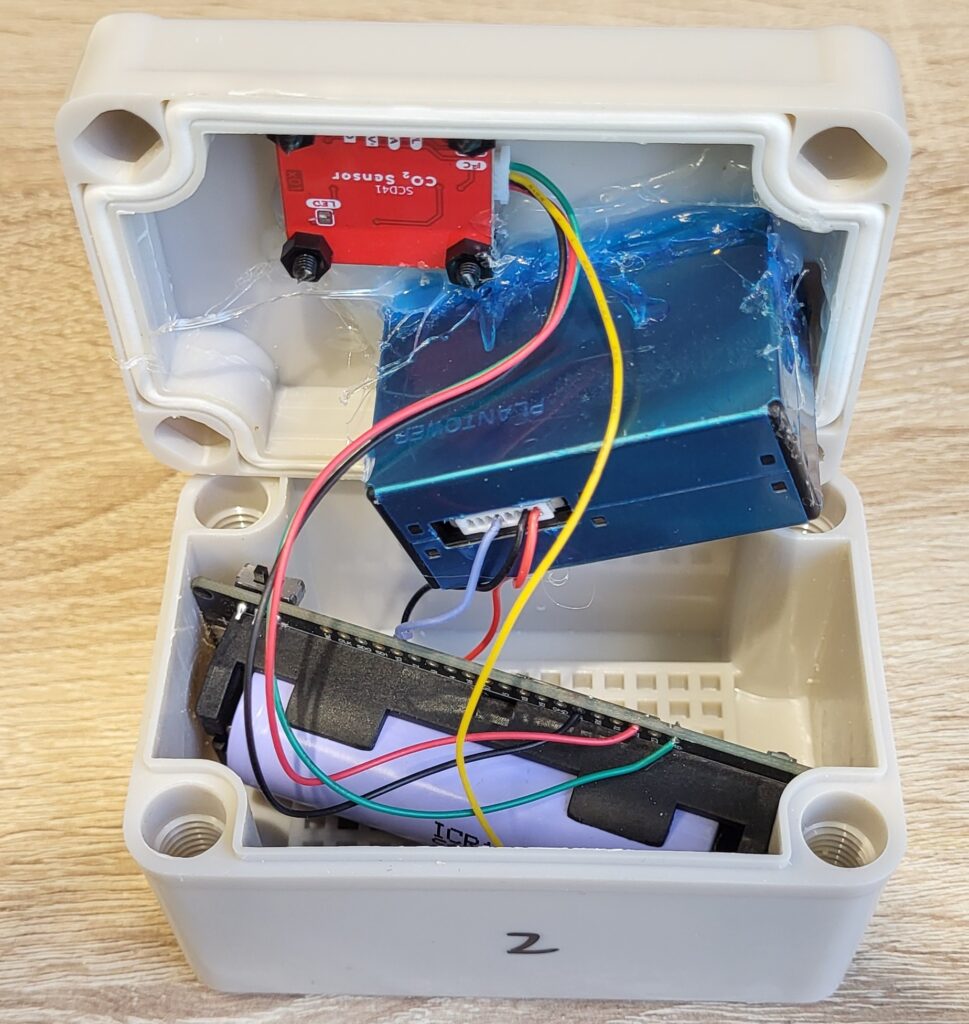
Use hot glue (a glue gun) to glue the Plantower into the hole.
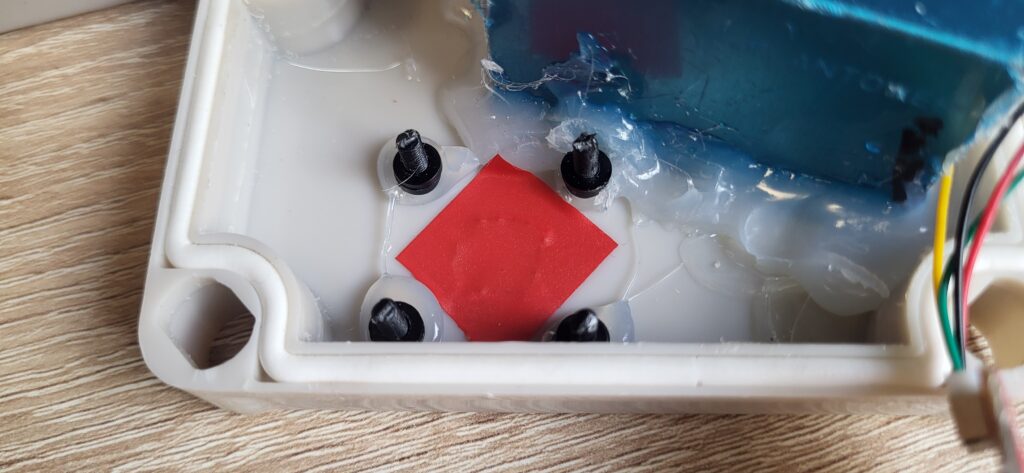
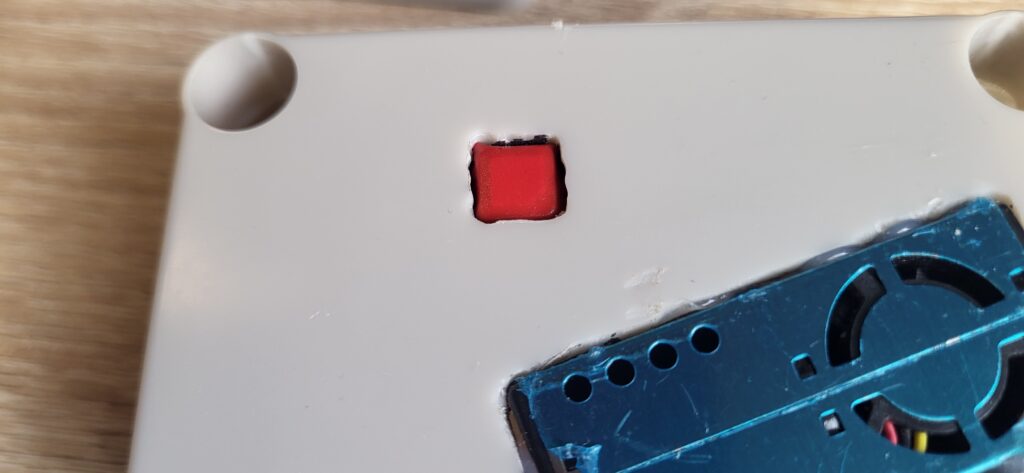
You can then attach the nylon bolts and nuts to the SCD41 and glue the bolts so the SCD41 sensor pokes through the hole being careful not to put glue over the SCD sensor. We do not recommend gluing the SCD41 sensor for this reason.
NOTE: it is extremely important you place the 18650 battery into the T-energy correctly -Incorrect placement will result in the electronic components being damaged and could result in a fire! If you are in any doubt, don’t proceed!
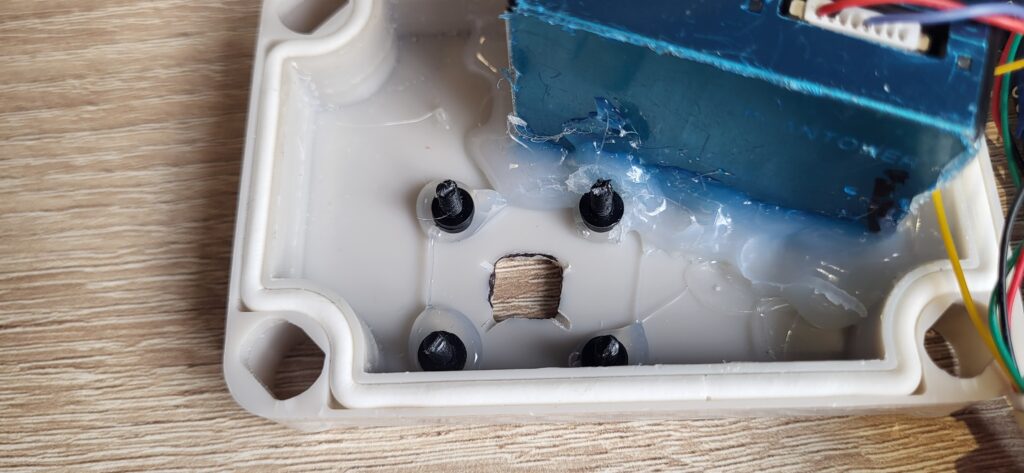
If you wish to make the SCD41 have a more snug fit, you can unscrew the SCD41 then apply some electrical tape over the hole (so it sticks to the enclosure). You can then screw the SCD41 bolts back and use a knife to cut around the sensor – make sure you do not cut the sensor itself. Rather, you can cut against the metal (gently).

5. Get researching!
Use the Open Science AQ logger and OpenScienceLogger app to measure and report air quality in the environment.
You may also be interested in joining a project